When you map an AD Group to a Collibra DQ role, you grant role-based access to all users from the selected AD Group to the selected Collibra DQ role outlined in the steps below. You can find additional information on creating custom application roles on the Role-Based Access Control page.
Application properties set in the owl-env.sh file or Web ConfigMap can be set to determine which LDAP properties correspond to LDAP query results. Go to Configuring user search for LDAP for more information about the LDAP properties.
When group mapping, you need the full path (unique) and the display name.
Example
LDAP_GROUP_RESULT_DN_ATTRIBUTE=distinguishedname
LDAP_GROUP_RESULT_NAME_ATTRIBUTE=CN
Steps
-
Sign in to Data Quality & Observability Classic and click
in the left navigation pane.
- Click Admin Console.
- Click User Management and then click AD Security.
- Ensure the connection type you want is selected in the Connections tab.
Note To enable SAML, go to Configuring SAML authentication.
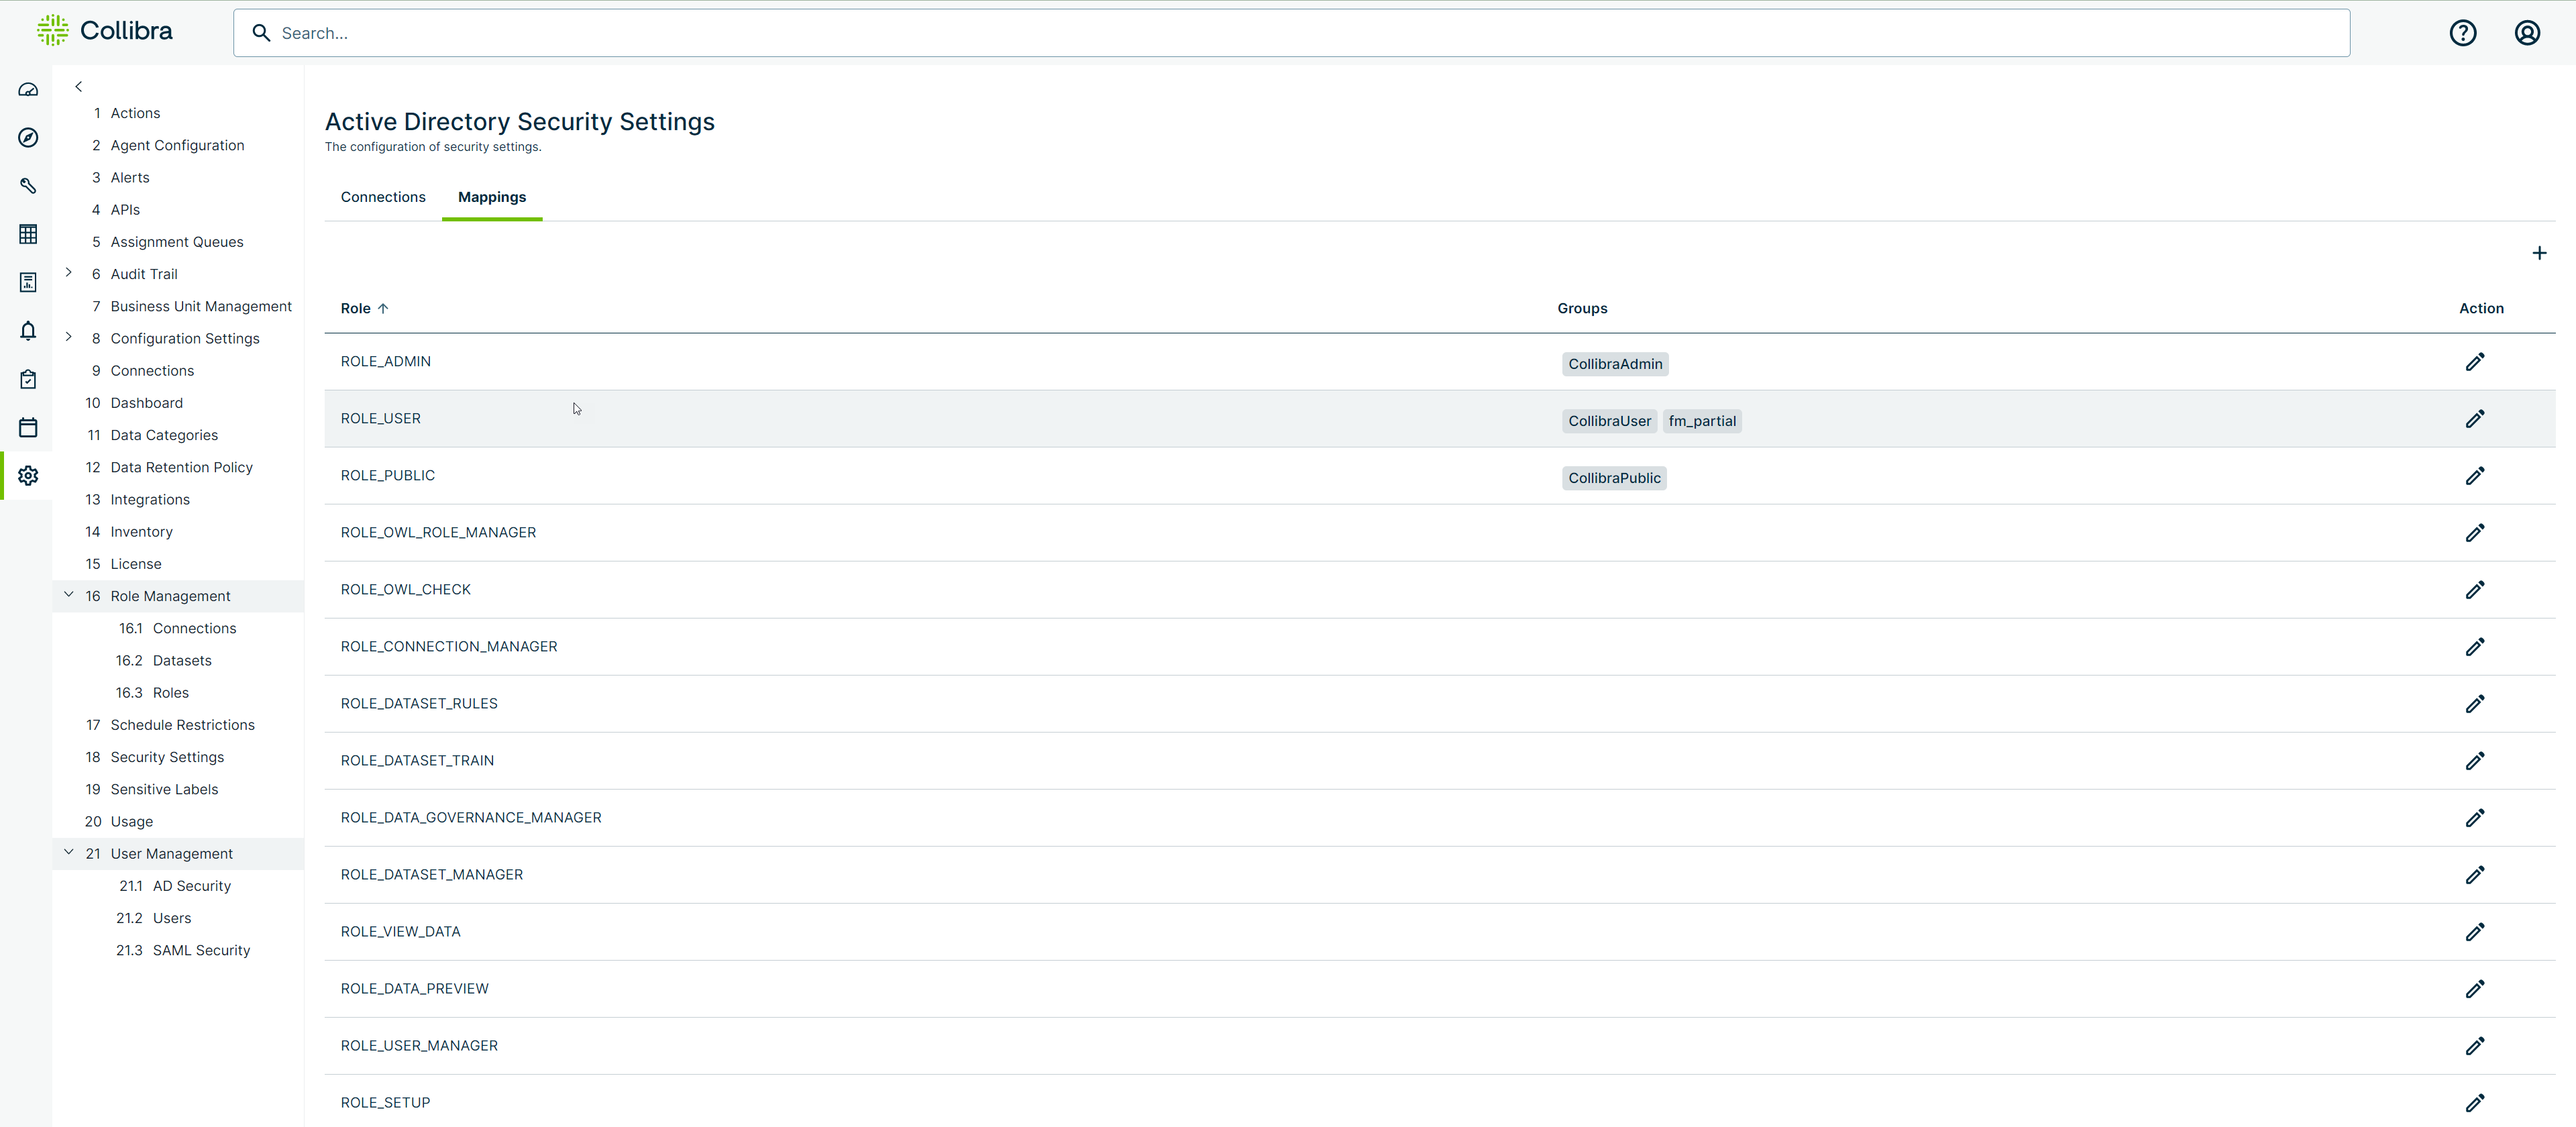
- Select the Mappings tab.
- To map a group to an existing role, click the
 icon for that role, in the Action column.
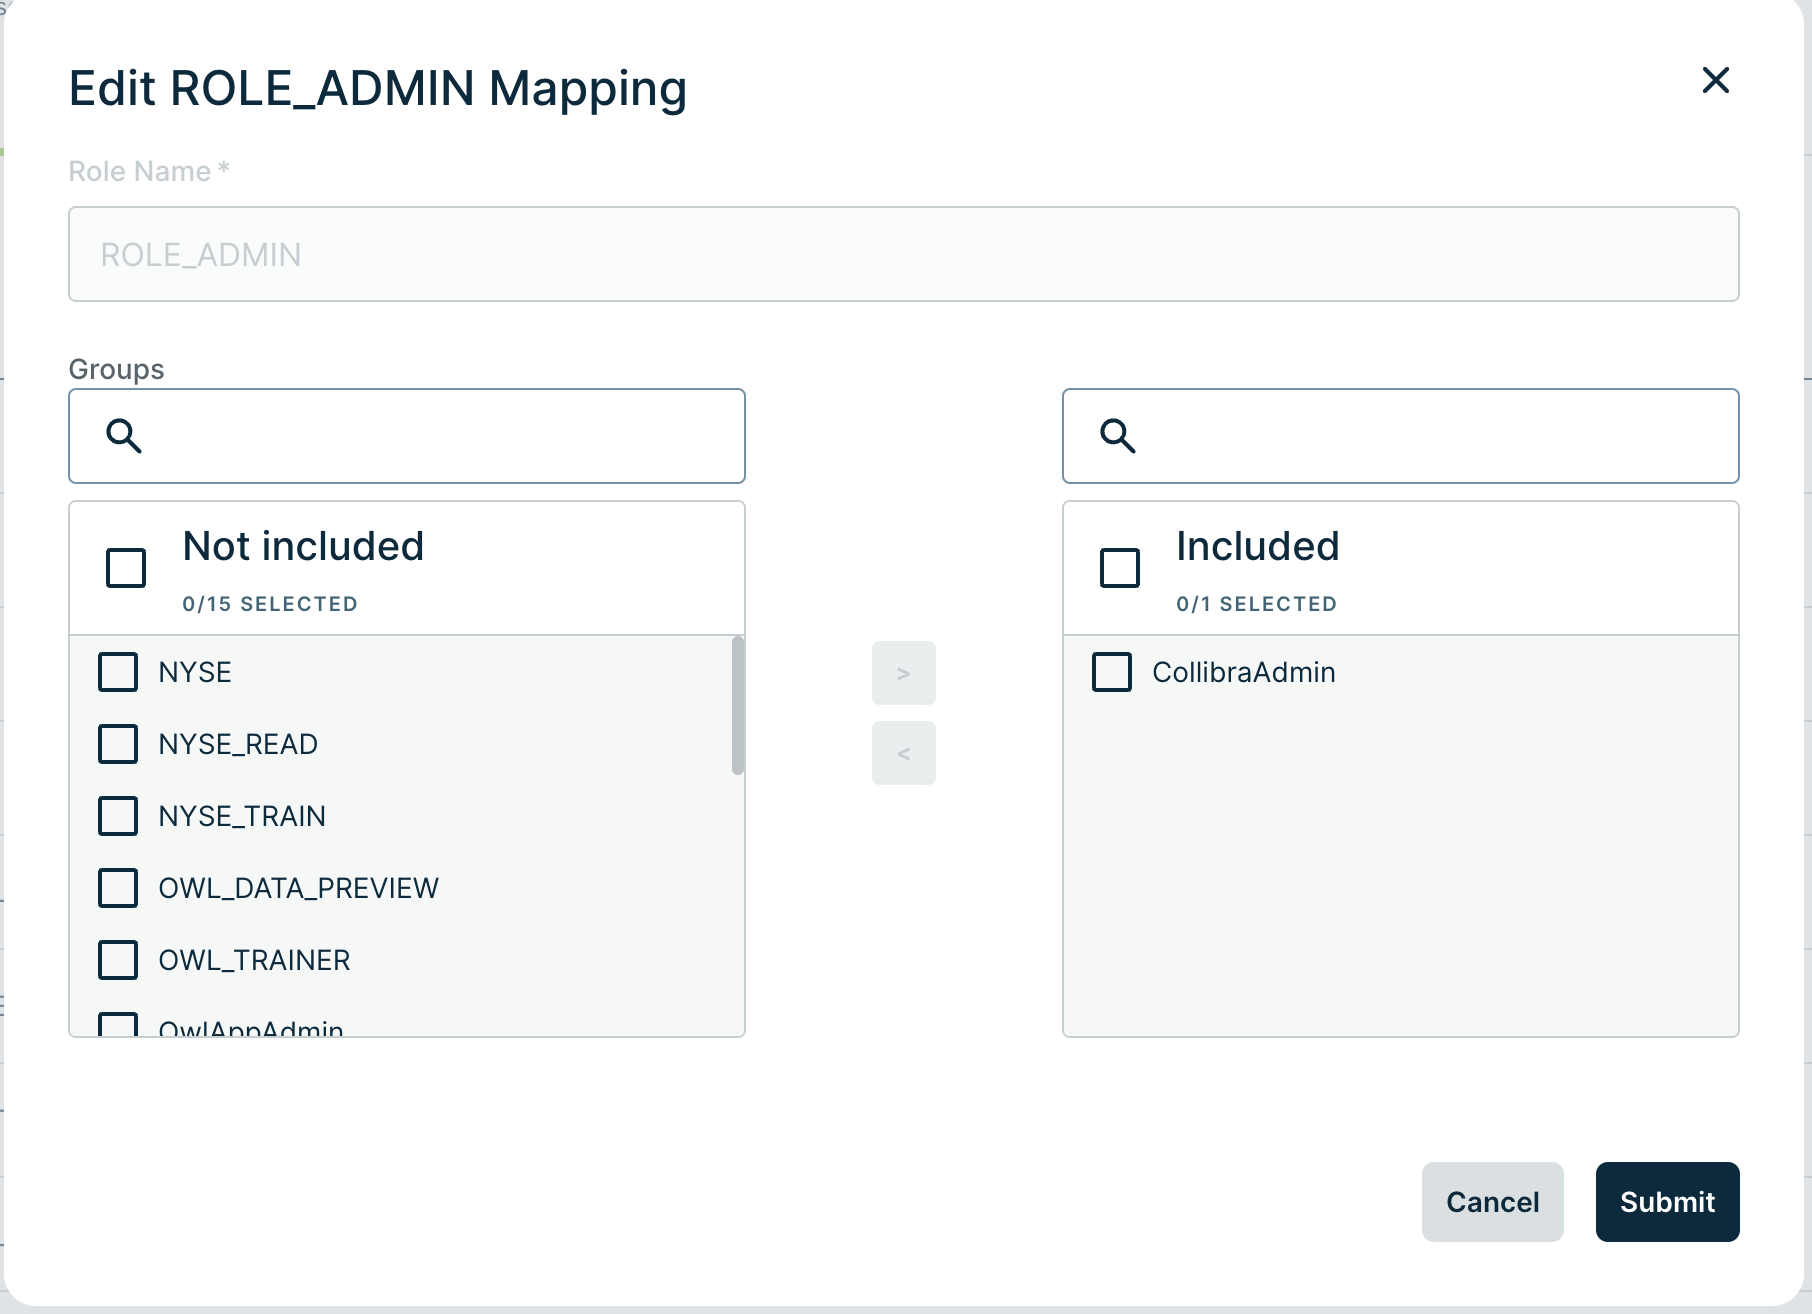
The edit role mapping window displays for that specific role. In this window, you can map groups to Collibra DQ roles by moving the groups from the Not included box to the Included box. To do this, click the and
and  icons. You can also filter the groups and roles in the search fields.
Note If Active Directory or LDAP is configured, the groups populate in the list, based on settings from the Connections page.
- Click Submit.
Once you successfully map an AD Group to an AD Role, log out of Collibra DQ and log in again as a Domain user.
Note You must restart the Collibra DQ web application by running ./owlmanage.sh restart_owlweb when toggling AD Enabled.
When logging into the Collibra DQ web application, append the domain to the end of the username.
.png)
Group to Role Mapping Without AD
If you are configuring SSO with SAML, you can map your groups to Collibra DQ roles without Active Directory configuration.
Note To enable SAML, go to Configuring SAML authentication.
Steps
-
Sign in to Data Quality & Observability Classic and click
in the left navigation pane.
-
Select Admin Console.
- From User Management in the left navigation panel, select AD Security.
- Select the Mappings tab.
- To map a group to an existing role, click the
 icon for that role, in the Action column.
The edit role mapping window displays for that specific role. In this window, you can map groups to Collibra DQ roles by moving the groups from the Not included box to the Included box. To do this, click the and
and  icons. You can also filter the groups and roles in the search fields.
 - Enter the name of a group in the input field below the Not included box and click the
 icon.
icon.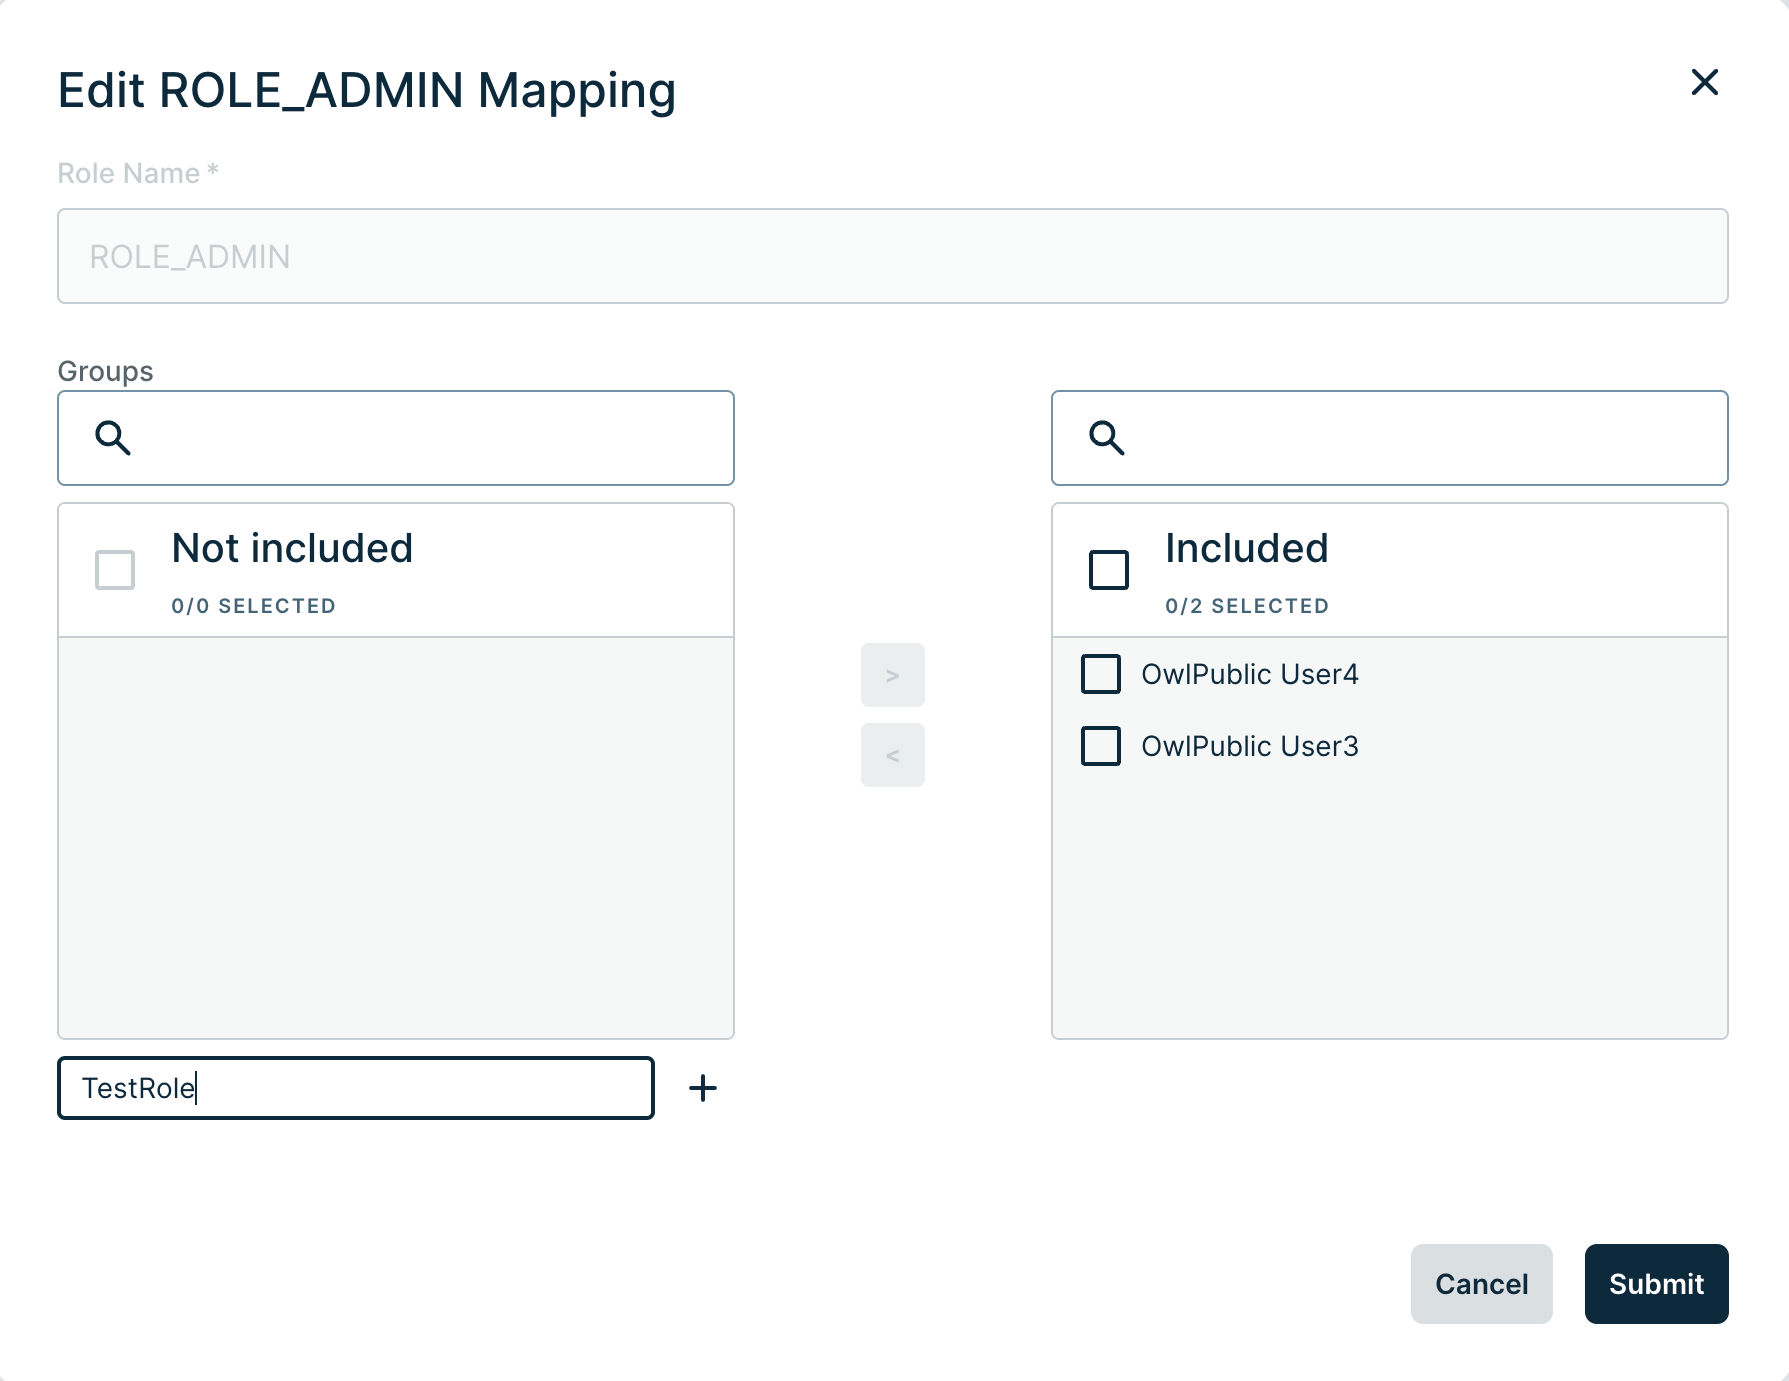
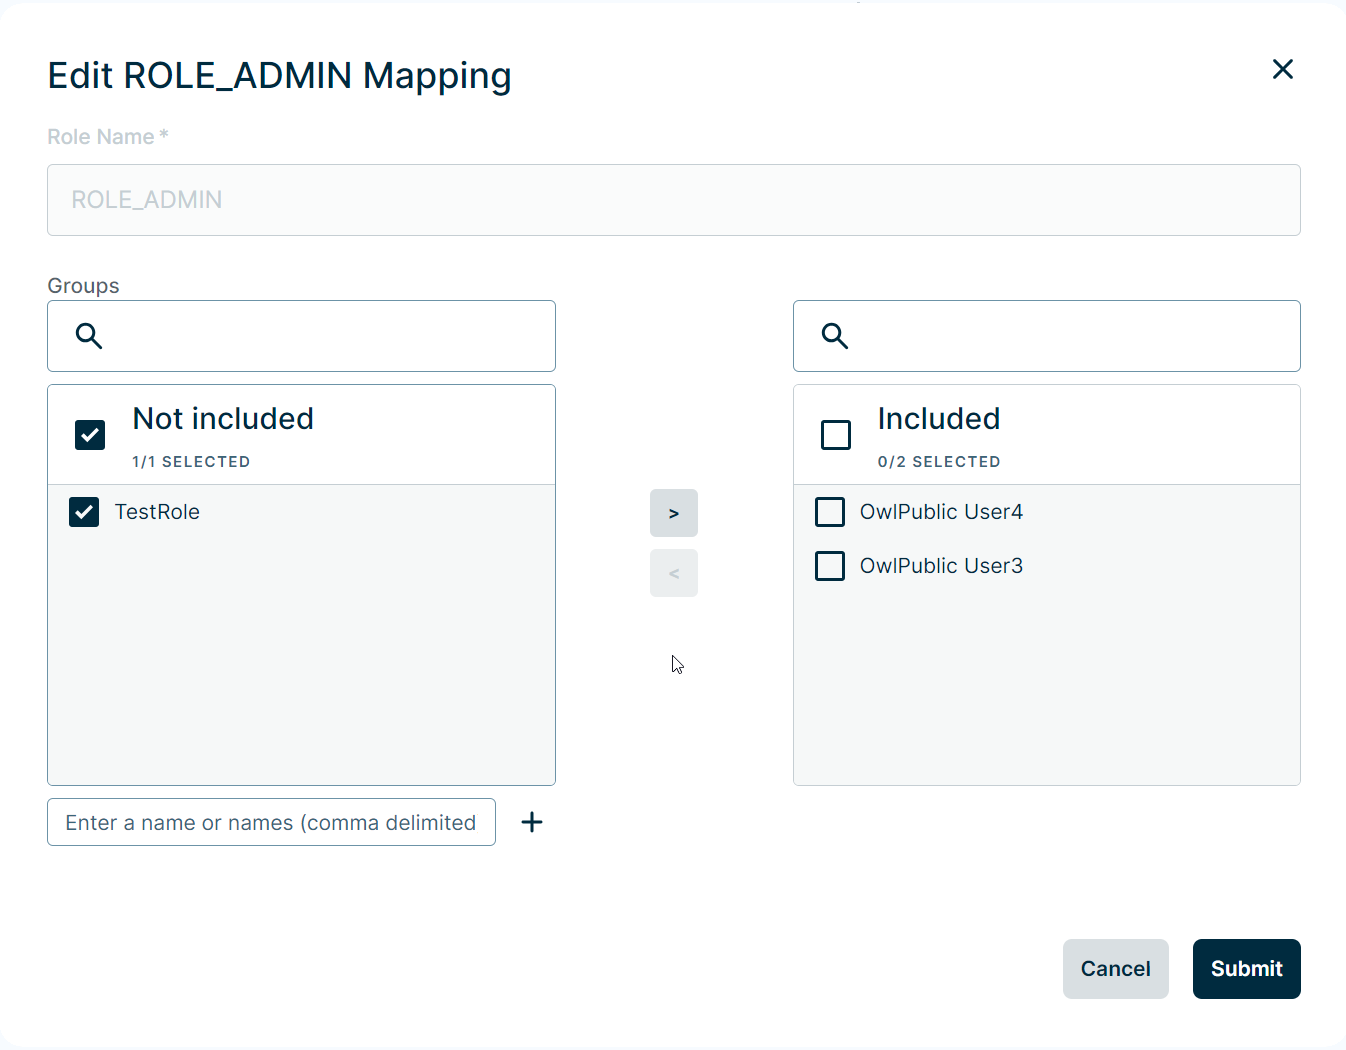
- You can now click the
 icon to map this group to the role.
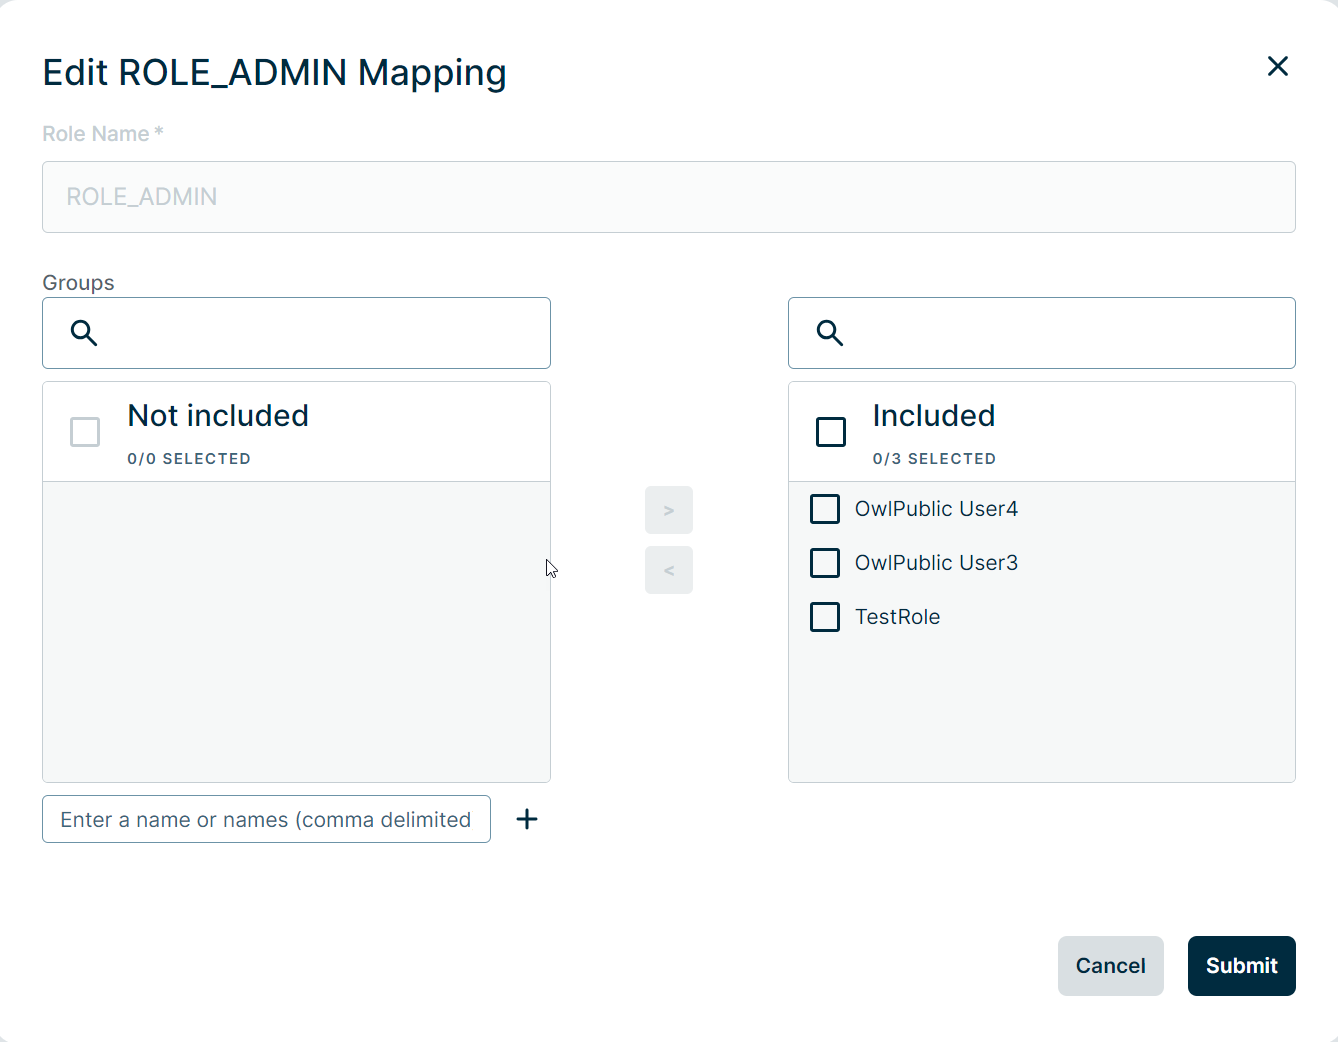
- When you have finished adding your group(s), click Submit.
Your new group(s) now appears in the Groups column for the selected role and users who are members of the group(s) should now have the permissions for the role.
